Welcome to Runway Academy. Today, we’re using the RunwayML‘s multi-motion brush to create lifelike movement across varying depth layers or distances in an image. First, let’s understand how we determine what would be realistic movement. Imagine your image as a series of slices, each representing a different depth or distance.
Objects closer to us are the front slices, while subjects that are farther away are in the back slices. Closer objects will appear to move faster than those further away, a concept called motion parallax, which we will harness when applying the motion brush to create realistic movement.
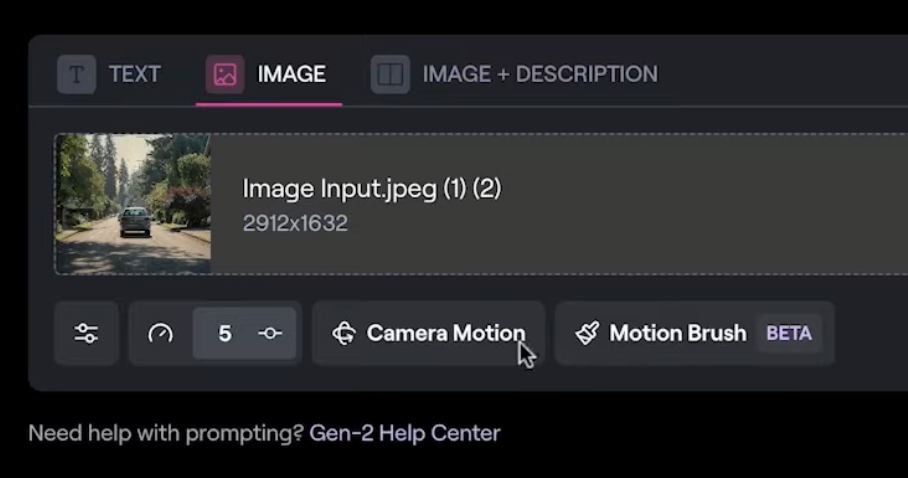
So, let’s head into the tutorial.
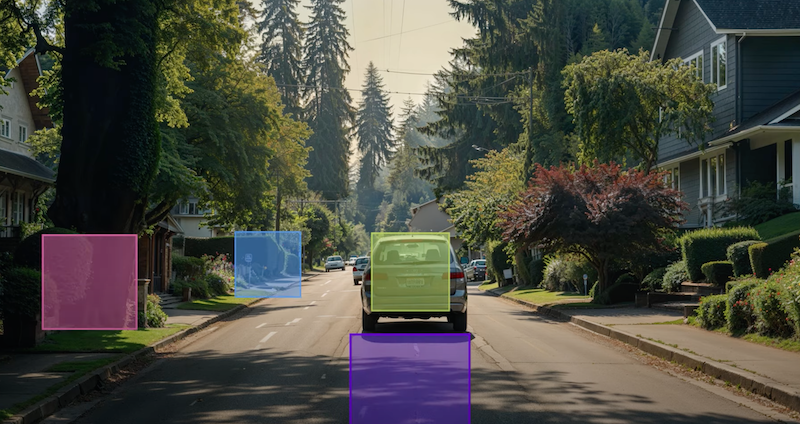
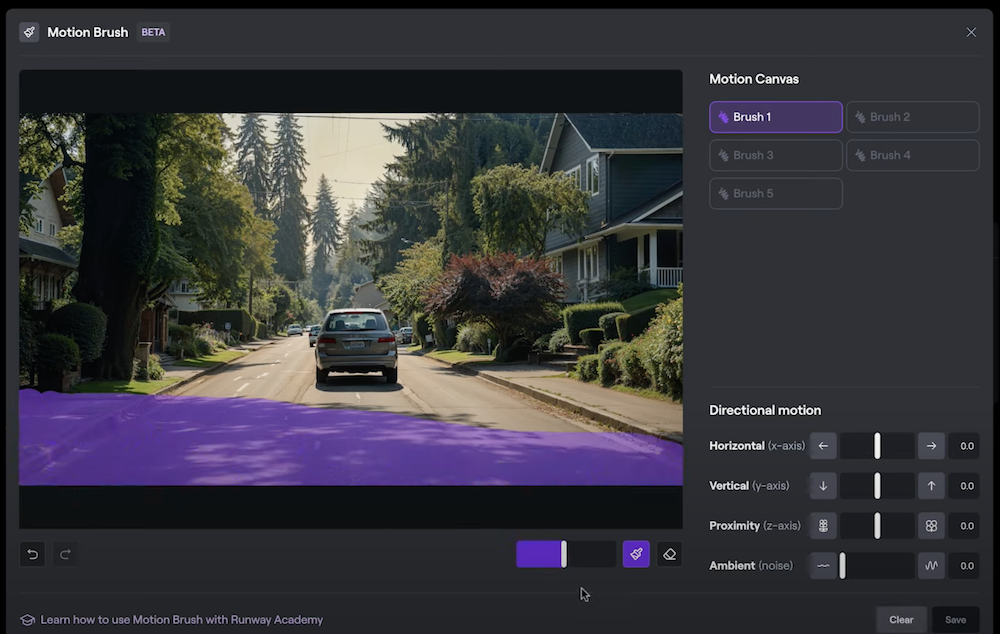
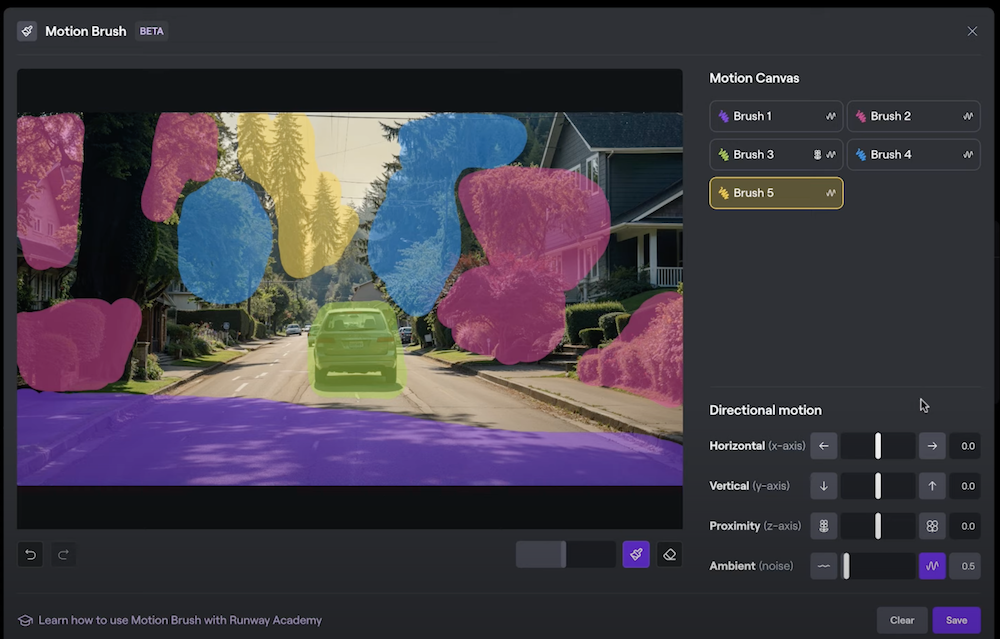
First, we begin with the closest layer. In our example, it’s the area featuring the tree shadow. Given its proximity, we’ll intensify the movement, setting the ambient motion to five.
Moving on to the layer just behind it, we’ll use brush two. This layer encompasses the large tree, the adjacent plants, and the roadside bushes on the other side, extending up to just about where the car is. We’ll moderate the movement here and adjust the ambient motion to three.
Next, we’ll select brush three for our next focal layer, which includes our main subject, the car. Here, we’ll balance ambient motion at two with a proximity setting of -2.5, simulating the car’s travel away from us.
For the area slightly beyond the car, we’ll use brush four and brush over these trees and bushes slightly past the car, in this focal layer or viscenter. Continuing our motion gradient, we’ll set the ambient motion to one.
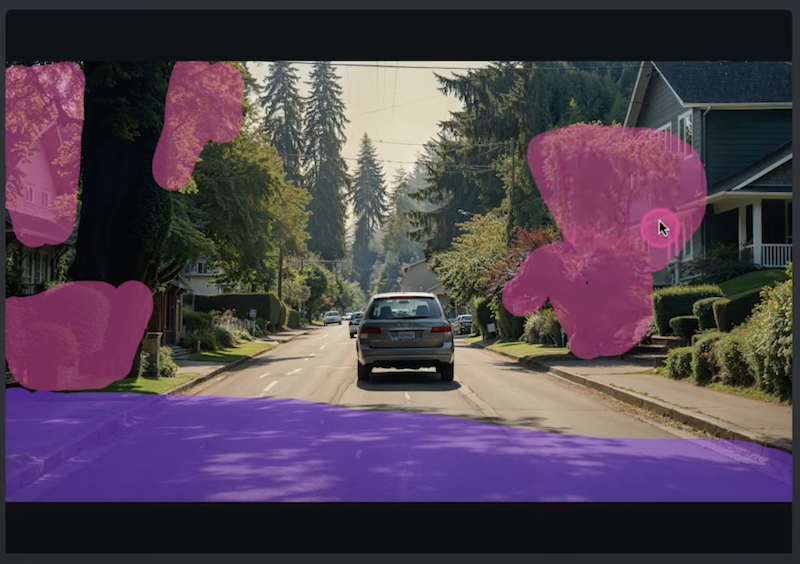
Finally, brush five defines the farthest layer. The distant trees will be brushed over, and the ambient motion dialed down to 0.5, reflecting the speed at which it appears to be moving in its remoteness or distance.
With all settings adjusted, we’re ready to save and generate the result: a naturally flowing scene mirroring real-life motion parallax.
Let’s quickly recap this process:
- Envision an image as layers, each reflecting varying distances.
- Apply different motion brushes to each of these visualized layers.
- Apply different motion values to each layer, keeping in mind that objects closer to us are given more motions, with the intensity of motion decreasing for farther layers.
Conclusion
This multi-motion brush technique, especially combined with camera movements, can add a real cinematic dimension to your work. We encourage you to experiment with these principles in your creations.
Thank you for reading, and for more resources, join community on Discord or use this button in your dashboard to get answers to any questions you have about Runway.
Read other articles: